Ubuntu->VMware->MINIX 3

ubuntu-minixUnix-like Microkernel Open-Source Operating System

Meet MINIX 3 a Unix-like, robust and compact operating system that is capable of recovering from drivers crashes. Current MINIX version is stable enough to suit perfectly Real-Time Embedded systems and systems that require stability over long periods of time without restart. Here is the quote from the official MINIX site.

What Is MINIX 3?

MINIX 3 is a free, open-source, operating system designed to be highly reliable, flexible, and secure. It is based on a tiny microkernel running in kernel mode with the rest of the operating system running as a number of isolated, protected, processes in user mode. It runs on x86 and ARM CPUs, is compatible with NetBSD, and runs thousands of NetBSD packages. Get MINIX 3 now and join our community!

‘Without MINIX there wouldn’t be Linux and Android’ – Andrew Tanenbaum

In his talk about the impact of MINIX Andrew Tanenbaum who is the developer of the OS told that without MINIX it wouldn’t be Linux, and without Linux it wouldn’t be Android. The world would be a somewhat different place than it is today. Well, If you are curious at this point what this MINIX is all about then that’s delve into practical installation steps.

How to run MINIX?

I used to work on Windows powered machine, but times change and Linux has fascinated me lately. As a consequence, I’ll describe here the process of installation of MINIX under VMware Player virtual machine running in Ubuntu Linux distribution. Certainly, it is possible to run MINIX under VM in Widows or as a stand alone operating system. But I find this scenarios more difficult to start with if all you want is simply to get first impression from MINIX.

Windows and Ubuntu Dual boot

If currently you are using Linux or Mac OS powered machine then skip this step and go to VMware Player chapter. Else welcome to Windows and Ubuntu dual boot installation description main steps.

  • First of all, backup your Windows system and create recovery disc.
  • Next thing is to download latest version of Ubuntu image and burn it to DVD disc or figure out how to use USB boot. In my case it was Ubuntu 14.04 LTS on Windows 7.
  • There are two ways to setup partitioning during Ubuntu installation: automatic and manual. I chose automatic and had no problems. You may choose whatever you like.
  • After this installation is straight forward, but if you do not sure how to proceed see this detailed video tutorial.

VMware Player

It seems you’ll pretty fast get how to use Ubuntu, since it feels like very intuitive system. Remember Google search and Ubuntu forums are your friends. Now that you are familiar with Ubuntu proceed to this tutorial on how to install VMware Palyer. If you need more tangible explanation watch this video tutorial on the subject.

MINIX 3

OK. Here we are, only few steps left to follow.

  • Download the MINIX version that you need from here. I used the 3.3.0 image downloaded for that matter.
  • When you’ve downloaded it there is a need to decompress it using bzip2 application.
bzip2 -d filename.bz2
  • Here are the steps to setup VMware Player that you’ve installed previously. The steps were taken from official MINIX site VM installation description with my adaptations.

Virtual Machine Setup

Before you install Minix 3, you will need to create a new virtual machine configuration. The VM configuration specifies the parameters of your Virtual machine, e.g., how much memory you want the VM to use, how big you want the virtual hard disk to be, etc.

Create a Virtual Machine — VMware Workstation and VMware Player (version > 3)

  1. Open VMware Player and choose to Create a New Virtual Machine.
  2. Select Use ISO image radio-button and browse to where you`ve decompressed MINIX image file; and then, press Next.
  3. At the Select a Guest Operating System, select Other and Version Other.
  4. For Virtual Machine Name, enter Minix3 or some other meaningful name.
  5. At the Specify Disk Capacity, enter 2 GB, which is enough for all packages and sources. You can make it larger if you need to add more source files. (Note, however, that maybe you’ll need 8 GB due a problem with X Window System configuration that we’ll encounter in a minute. Andrei)
  6. At the Ready to Create Virtual Machine, ensure that Power on this virtual machine after creation is not checked; and then, press Finish.

You will need to edit the memory settings according to your needs. In the Devices section, select the Memory, and adjust the memory accordingly. Note that, in order to run the X Window System on Minix, you need at least 384MB.

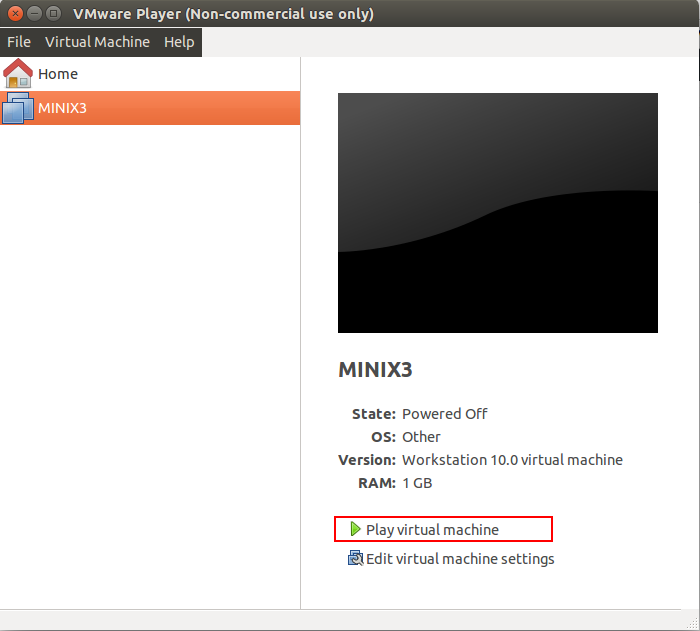
When VM starts after you’ve pressed Finish in step 6 or you’ve played VM manually proceed to regular MINIX installation that were taken form this tutorial.

MINIX_VM_play

Installing

These steps correspond to the steps on the screen.

Running the Setup script

When the login prompt appears, login as root. Press Enter when prompted for a password.

To start the installation of MINIX on the hard disk, type

setup

After this and all other commands, be sure to type ENTER (RETURN). When the installation script ends a screen with a colon, hit ENTER to continue.

If the screen suddenly goes blank, press CTRL-F3 to select software scrolling (should only be needed on very old computers). Note that CTRL-key means depress the CTRL key and while holding it down, press “key.”

Select keyboard type

When you are asked to select your national keyboard, do so. This and other steps have a default choice, in square brackets. If you agree with it, just hit ENTER. In most steps, the default is generally a good choice for beginners. The us-swap keyboard interchanges the CAPS LOCK and CTRL keys, as is conventional on UNIX systems.

Create or select a partition for MINIX

You will first be asked if you are an expert in MINIX disk partitioning. If so, you will be placed in the part program to give you full power to edit the Master Boot Record (and enough rope to hang yourself). If you are not an expert, press ENTER for the default action, which is an automated step-by-step guide to formatting a disk partition for MINIX.

Select a disk

An IDE controller may have up to four disks. The setup script will now look for each one. Just ignore any error messages. When the drives are listed, select one. and confirm your choice.

Select a disk region

Now choose a region to install MINIX into. You have three choices:

  1. Select a free region
  2. Select a partition to overwrite
  3. Delete a partition to free up space and merge with adjacent free space

For choices (1) and (2), type the region number. For (3) type:

delete

then give the region number when asked. This region will be overwritten and its previous contents lost forever.

Confirm your choices

You have now reached the point of no return. You will be asked if you want to continue. If you do, the data in the selected region will be lost forever. If you are sure, type:

yes

and then ENTER. To exit the setup script without changing the partition table, hit CTRL-C.

Reinstall choice

If you chose an existing MINIX partition, in this step you will be offered a choice between a Full install, which erases everything in the partition, and a Reinstall, which does not affect your existing /home partition. This design means that you can put your personal files on /home and reinstall a newer version of MINIX when it is available without losing your personal files.

Select the size of /home

The selected partition will be divided into three subpartitions: root, /usr, and /home.

  • /home, will contain only your own personal files. Specify how much of the partition should be set aside for your files. You will be asked to confirm your choice.
  • /usr, contains most of the software, as well as all the optional packages. It is advised to give it several gigabytes if possible. It’s size is computed as the remaining of space left on the MINIX partition, so the bigger /home is, the smaller /usr is.

Select a block size

Disk block sizes of 1-KB, 2-KB, 4-KB, and 8-KB are supported, but to use a size larger than 4-KB you have to change a constant and recompile the system. Use the default (4 KB) here.

Select your Ethernet chip

You will now be asked which (if any) of the available Ethernet drivers you want installed. Network settings can be changed after installation. Please see Network Configuration for details.

Restart

When the copying is complete, MINIX is installed. Shut the system down by typing:

poweroff

Always stop MINIX this way to avoid data loss as MINIX keeps some files on the RAM disk and only copies them back to the hard disk at shutdown time.

Next Steps

Note! The MINIX installation does not install the things like X11 and GCC automatically. You have to do this after reboot according to Post installation instructions.

What’s next?

Now it is time to update  default packages that comes with MINIX and install additional ones you need. I propose to install all available packages. The steps below are taken from here.

Installing Binary Packages

pkgin

pkgin is the binary package manager for MINIX 3. This page describes how to use it.

Software packages also can built from their source code. See Installing Source Packages for details.

Using pkgin

First, you will need to fetch the package list and populate the package database:

# pkgin update

This step can be re-run to update the package list.

If you would like to install a package, you can run:

# pkgin install git-base
# pkgin install binutils
# pkgin install clang

Also, there is a way to install everything:

# pkgin_all

 X Window System mystery

So far, there is some problem, at least for me to install X Window System on MINIX. Update me if you’ll succeed.

Take care.
Java Code Geeks

Fork GitHub repository to your blog. The workaround story.

NuPIC_IsraelUpdate: the wiki was updated. So Houston we have no problem.

Thanks to David and Matt.

NuPIC, we’ve had a problem!

‘To whom it may concern’ phrase is appropriate to start this post. But actually I know whom it may concern.

David, Pascal and Matt etc. and all other hackers who are eager to play with NuPIC Open Source project.

Those of you who want to fork numenta/htm.java repository in GitHub and then configure working Java project in Eclipse may stumble upon the problem of out-of-date Wiki. Particularly, I mean Eclipse Setup Tips.

Missing ‘Edit’ button

So far, I have no permission to edit the Eclipse Setup Tips page, so as a workaround I`ll provide the updated version of it in this blog post with updated content in green.

Updated version of the Wiki page

Eclipse Development Environment Setup

Below you’ll find a step by step procedure for setting up your development environment in Eclipse (recommended). The reason this is recommended is because it is known by this author that by using the PyDev

(Python Plugin: in Eclipse click “help > Eclipse Marketplace” in the search field type PyDev or Python)

plugin, you can run both the Python version of NuPIC and the Java version side by side!(This text was written during the “porting phase” of htm.java which is occurring rapidly and may not apply by the time you read this.)

If you have Eclipse already setup, you can skip step 1 and 2.

1.) Download Eclipse – link can be found here

2.) Setup your workspace – Eclipse’s concept for a container directory that contains project information relevant to the work you’re doing. Give your workspace a name.

3.) Install Gradle – Nothing to do with Eclipse (yet). This is a system install and you will end up installing both Gradle as a separate tool and the Gradle plugin, information can be found here .Confirm that Gradle is installed correctly by going to your “terminal” or command line and typing “gradle check” from just inside the htm.java directory. You should see the the project build and tests run and finish with a “success” message.

If instead, you get something like this

no_gradle_path

C:\Users\XYZ\Documents\GitHub\htm.java>gradle check
‘gradle’ is not recognized as an internal or external command,
operable program or batch file.

Then it means that PATH environment variable is not set. An immediate workaround is to set it with this command

C:\Users\XYZ\Documents\GitHub\htm.java>set PATH=C:\Program Files\gradle-2.4\bin;%PATH%

If while trying to ‘gradle check’ once again you`ll get following error 

gradle_jvm_version_mismatch

C:\Users\XYZ\Documents\GitHub\htm.java>gradle check
:compileJava FAILED

FAILURE: Build failed with an exception.

* What went wrong:
Execution failed for task ‘:compileJava’.
> invalid source release: 1.8

* Try:
Run with –stacktrace option to get the stack trace. Run with –info or –debug option to get more log output.

BUILD FAILED

Total time: 53.05 secs

It means that the PATH to JVM picked by gradle is not the one used by Eclipse project.

To fix this immediately set the path to the folder where appropriate JDK version resides. In this case to jdk/jre 1.8

C:\Users\XYZ\Documents\GitHub\htm.java>set JAVA_HOME=C:\Program Files\Java\jre1.8.0_25

C:\Users\XYZ\Documents\GitHub\htm.java>gradle check
:compileJavaNote: C:\Users\XYZ\Documents\GitHub\htm.java\src\main\java\org\numenta\nupic

\util\SparseObjectMatrix.java uses unchecked or unsafe operations.
Note: Recompile with -Xlint:unchecked for details.

:processResources UP-TO-DATE
:classes
:compileTestJava
:processTestResources
:testClasses
:test
:checkwarning: Supported source version ‘RELEASE_6’ from annotation processor ‘org.openjdk.jmh.generators.BenchmarkProcessor’ less than -source ‘1.8’
Note: Some input files use unchecked or unsafe operations.
Note: Recompile with -Xlint:unchecked for details.
1 warning
No matching benchmarks. Miss-spelled regexp?
Use EXTRA verbose mode to debug the pattern matching.

BUILD SUCCESSFUL

4.) Open Eclipse in your newly created workspace, and install the Gradle plugin. Click on the top menu bar “Help > Eclipse Marketplace”. In the search field type Gradle, and hit. Follow the directions (install everything). install this plugin, that worked well lately,  Gradle Integration for Eclipse (4.4) 3.6.4.RELEASE

gralde_plugin

5.) Import your project as a Git Project. From the top menu in Eclipse, choose “File > Import…”, then choose “Git > Projects from Git” … hit next.

Import Git

…then choose “Existing local repository”

… it should look like the following (after clicking “Add” and locating your htm.java clone directory)

… Import existing projects should already be selected. If not, select it and click “Finish”

6.) Now setup your build path. Right-click on your project root in the “Package Explorer” tab and choose “Properties” at the bottom of the menu. On the next dialog, click “Java Build Path” and then add two source directories (from the “Source” tab) to your path by clicking “Add Folder…” twice and selecting

a.) src/main/java,  b.) src/test/java, c.)  src/jmh/java as shown below:

(update screenshot with additional folder)

eclipse-5

… Add the libs/jars to the path. Right click on your project root and at the bottom of the menu click “Properties” again. From the “Libraries” tab, click on “Add JARs” – navigate to “libs” and select all the jars (hold down the key and select each and every jar). as seen below:

(update screenshot with additional dependencies)

eclipse-6

This will allow you to build the project! 🙂

To get the tests to run, from the top menu bar, click on the tiny black down-arrow to the right of the round green button with the right-facing white arrow. This is your “Run” button used to launch any Java executables. You can set up run configurations from here, but usually if you have a test class or any Java file with a “public static void main(String[] args) method in it, you can just right-click anywhere in the file or right-click the file in the “Package Explorer” and click “Run As” > “Application” or “JUnit test”.

As always, your mileage may vary depending on exact setups, but this should help 90% of developer environments to get configured correctly!

Happy Hacking! 🙂

Help needed

That’s it more or less. I think Pascal and David may help me to solve the ‘Edit’ button mystery once and for all.
Java Code Geeks

How to getExperience() ? boolean hasExperience = experience.isEmpty();

 myExperience  = null;

It seems to me almost everyone who`ll read this post faced at least once in a lifetime the problem of having no experience. And by experience I mean particularly programming experience. The enigma of no experience is an interesting phenomenon in itself, but this post is all about practical suggestions from leading developers on how to get one. Since I have no 1 – 5 years of expected experience in software development myself it is hard for me to give you an advise on such a serious topic. That is why I choose to look from the outside and incorporate in this post advices of others.

‘Open Source is the answer’ – Alex Allain, developer, author of Jumping into C++ 

Alex

Here comes my adaptation of Alex`s advice that he once gave me. In short, the question was about software automation versus development position dilemma.

Hi Andrei, if you work through all of Jumping into C++ and complete the exercises , you will know C++ well. What you won’t really have, that can be valuable for software development jobs:

1) practice working with and modifying an existing large code base (at least 10,000+ lines of code, ideally 100,000+ lines of code to really get a feel for working on a big system) – part of this will be about learning design patterns and part of it is about learning to navigate a big code base

2) knowledge of Java/ C++ libraries/etc. and how to work with them

3) experience estimating projects

4) writing specs or design documents for really large features

5) experience working on code with other people–going through code reviews, debating design points, convincing other people that your approach is correct, learning how to document your code so that other people can understand it

6) experience working with the ‘nuts and bolts’ of a software project–setting up a particular project’s build environment, understanding how to work with and debug problems with many unfamiliar tools

7) experience using source control systems like git, mercurial, SVN, CVS, etc

8) experience dealing with problems ‘at scale’ with lots of data or in the real world – needing sophisticated algorithms, debugging memory exhaustion or performance slowdowns, dealing with end user computers, etc.

Most of these other things can be developed through working on a project – either QA automation or working on open source software. To be honest, I think that working on an open source project is likely to be a better learning experience and career builder than doing QA automation:

1) QA automation is unlikely to be as rigorous as a good open source project

2) QA automation probably won’t use Java/C++ (this is OK, but if you want to use your existing skills best, it may not be a good fit)

3) QA automation won’t allow you to show people your github commits that show exactly what you are capable of

That said, QA automation won’t prevent you from also working on a separate project, so if you have a chance to do that, I wouldn’t turn it down. It should only add to your resume.

So from Alex`s advice it is clear that contribution to Open Source Community, such as NuPIC may be a good option for some of you and me, actually. It will not only help you get missing experience it`ll also help you find new friends and meet new people. Those new connections may be very beneficial to your career in the future.

‘Speaking words of wisdom, let it be.’ – John Sonmez, developer, author of Soft Skills: The software developer’s life manual

John

Following are John`s parting words to a group of Java Enterprise Edition course graduates.

Andrei tells me that all of you are nearing the “finish line” of your Java EE course.

I congratulate you on this accomplishment.

I’m sure, for most of you, this has not been an easy task.

Any time in life that we choose to better ourselves, we can be sure that we will face resistance.

By reaching the end of this course, you have proven your ability to overcome it, but the real challenge still awaits.

It is one thing to acquire knowledge.

Knowledge can be gained in a relatively short period of time, with sustained effort.

It is another thing to acquire wisdom.

Wisdom is much more elusive. It is not guaranteed.

I know many experienced software developers who have plenty of knowledge of their craft, but lack the wisdom to apply it appropriately.

Wisdom is only achieved through careful devotion and perseverance.

Wisdom is gained through the application and understanding of principles—in life, and in software development.

Seek to not only knowledge, but understanding.

It is one thing to know how to write good code. It is another thing to understand what makes it good.

It is one thing to know the answers to the questions you will be asked in your interviews. It is another thing to understand not only why the answers are correct, but why the questions themselves are relevant.

As you are out in the real world, interviewing for jobs, don’t be so concerned with landing this job or that job—many opportunities will come and go.

Instead, be concerned with learning from each experience; using each experience to increase your understanding; to grow in wisdom.

Have confidence that it is impossible to not reach your destination if you continue on the right roads. Do not be in a hurry to arrive, in due time you will reach your destination.

Do not worry what you know now.

Do not worry about passing this interview or that one.

Do not even worry about the questions you are asked when you are in an interview.

Instead, focus, concentrate on learning, on observing.

Watch yourself as you answer the questions.

If an interview went good, ask yourself why.

If it went bad, also find out why.

Consider each interview, each question a step that moves you forward.

Do not worry about the outcome, instead worry about improving each time.

If you improve each time you interview, the eventual outcome is inevitable, so what does it matter how many tries it takes to get there.

And when you do get that first programming job, you are far from done. It is only another step.

Still seek to improve, each day, each job, every time you sit down to write some code.

I wish you all the best in your journey.

Sincerely,

John Sonmez

http://simpleprogrammer.com

return hasExperience = true;

Let`s recap and summarize the advices given.

  1. Open Source contribution is the way to go at least for someone of you.
  2. Curiosity and desire to deeply understand the subject of yours with feedback from practice.
  3. Communication with other people is the key (Dale Carnegie).
  4. May the Force be with you to keep going.

N.B.

Hire yourself for your own start-up company. It`s simple as let.

Java Code Geeks

Machine Intelligence at Numenta. Contribute and have fun.

Numenta

The Dawn

For centuries people were fascinated with the brain and tried to understand how it might work. Real scientific research has started about 100 years ago. With the emergence of Artificial Intelligence movement in the mid 50th of the previous century there was a hope that the answer to the question of how to build intelligent machines was just round the corner. Today in 2015 the hopes of forerunners of AI community still remain the same as in the beginning.

New insights and the theory

Things started to change back in 2005 when ‘On Intelligence‘ the book written by Jeff Hawkins and Sandra Blakeslee provided an outline of the theory that for the first time explained the inner workings of the neocortex with a small number of biologically inspired assumptions. In the years to come predictions that followed from Jeff`s theory of the possible neocortex algorithm proved to be sound and fruitful and reinforced the theory.

Numenta

The year the ‘On Intelligence’ was published another significant event took place and that was the founding of Numenta company. The main goal of the company was and still is to implement the proposed algorithm of neocortex inner workings in practical applications.

Numenta Platform for Intelligent Computing

Very soon Numenta has decided to open source their research implementations of the neocortex algorithm which is known as Hierarchical Temporal Memory (HTM) and Numenta Platform for Intelligent Computing (NuPIC) was born. Today, hundreds of NuPIC Open Source Community members along with Numenta development team are engaged in implementation and refinement of Cortical Learning Algorithm (CLA) that is a subset of HTM.

How to contribute

There is a number of ways in which it is possible to contribute.

  1. Get involved in NuPIC Open Sources Community and help to develop next step in biologically inspired Machine Intelligence. Maybe you`ll be the one who propose groundbreaking application of this technology in new surprising fields.
  2. Play with already existing applications, such as Grok which is used by Amazon.
  3. Have fun.

Java Code Geeks

To take a programming course or not? Maybe not to.

Have you ever thought of taking programming course to study certain subject?

I had and took one. But now I have to confess it was not a perfect move.

My experience shows that programming courses do not teach you anything you cannot learn from Internet alone with forums, manuals and free courses out there.

Having completed recently a year long course on programming only amplifies my conjecture – there is no need to take such courses except of particular courses such as Pluralsight that charge only $29 a month.

The problem with programming courses that they tend to be very expensive and do not teach real programming experience instead they haphazardly covering hundreds of various topics never diving deep inside to understand them fully.

This is not the way. The best way is to start developing any application and learn the material as you need it.

As John Sonmez suggests in his blog the most easiest and affordable way to do this these days is to build mobile application.

So do not waste your time and money, and invest them somewhere else.

Take care.

Java Code Geeks