A Guide to Kaitai Web IDE
This post is a continuation of my previous post about Kaitai Struct DSL language for description of binary data formats. This post will describe how to download Kaitai Web IDE and run it locally as a web application and also how to build and run it.
Prerequisites
If you are interested to run Kaitai Web IDE locally or take part in its development then there is a need to install some additional software, such as
- Anaconda 2/3 that will help install
- Git
- Python 2/3
- Node.js (to be able to build locally)
This guide will explain how to do it on Windows and Linux(Ubuntu).
In addition the following versions will be used
- Anaconda with Python 2.7
- Git 2.14.1
- Python 2.7
- Node.js 6.11.0
Anaconda for the rescue
Anaconda is a package manager for various libraries be it Python, Node.js etc. We’ll use it to install all the dependencies we need for Kaitai Web IDE.
1. Download Anaconda from official site
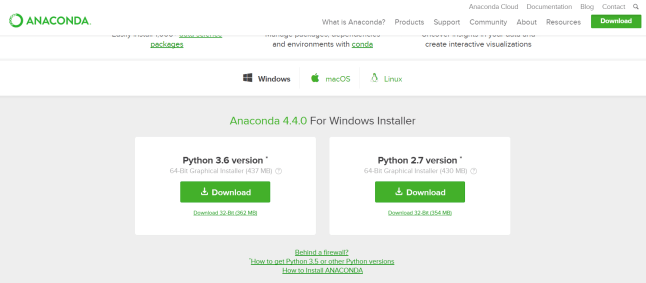
For the sake of this tutorial you can chose either Python 2.7 or 3.6 version.
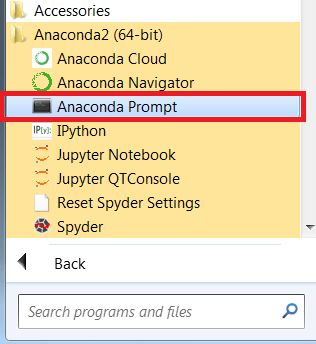
2. Install Anaconda as any application.
Look for newly installed programs and run Anaconda Prompt (Windows)
3. Open command line or Anaconda prompt and install Git (taken from here)
conda install -c conda-forge git
4. Approve if asked to install any additional packages.
5. Test that Git was installed correctly
C:\Users>git --version
git version 2.14.1.windows.1
6. Clone or download Kaitai Web IDE stable release from GitHub repository.
git clone https://github.com/kaitai-io/ide-kaitai-io.github.io
7. You’ll see output resembling this one
C:\Users>git clone https://g
ithub.com/kaitai-io/ide-kaitai-io.github.io
Cloning into 'ide-kaitai-io.github.io'...
remote: Counting objects: 3003, done.
remote: Compressing objects: 100% (8/8), done.
remote: Total 3003 (delta 0), reused 1 (delta 0), pack-reused 2995
Receiving objects: 100% (3003/3003), 5.98 MiB | 5.11 MiB/s, done.
Resolving deltas: 100% (2118/2118), done.
To run Kaitai Web IDE as is
8. Open the folder where you placed Kaitai Web IDE (in my case
C:\Users\ide-kaitai-io.github.io
)
9. Run following command to lunch web server that will host locally Kaitai Web IDE app
python -mSimpleHTTPServer
10. Go to http://127.0.0.1:8000/
Note: pay attention that instead of port 8000 you may need to use any other such as 8888 if 8000 is used by some application if you see the error below
socket.error: [Errno 10013] An attempt was made to access a socket in a way forb
idden by its access permissions
10 (in case of error). To fix this execute previous command with a port as an argument
python -mSimpleHTTPServer 8888
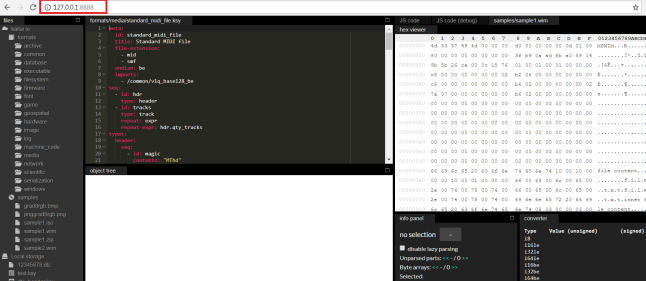
Go to http://127.0.0.1:8888/
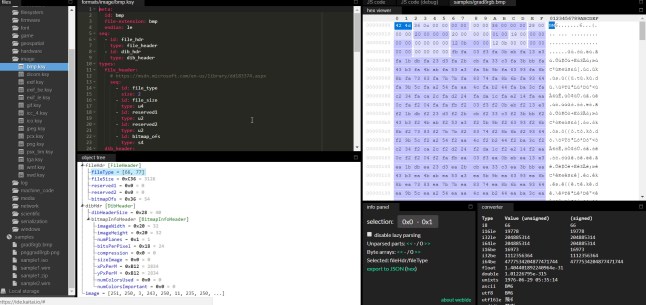
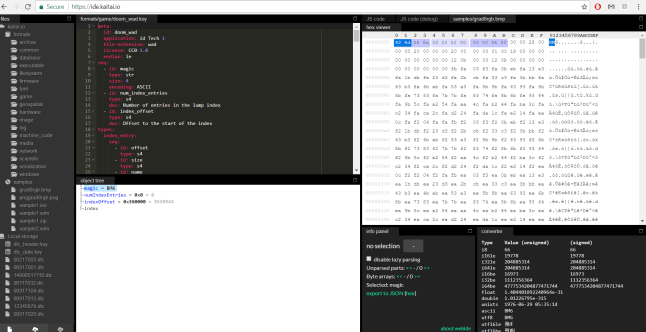
As you can see in the screenshot below I had to run on port 8888 and Kaitai Web IDE is up and running!
Build it yourself
If you want to build Kaitai Web IDE yourself then install additional software with Anaconda.
The attempt below failed but the one after it passed. I preserve it for the sake of an argument (it can be done easily on Linux)
11. Install Node.js from here
conda install -c conda-forge nodejs12. Approve if asked to install any additional packages.
And there was an error on Windows (why is that?)
CondaError: WindowsError(206, 'The filename or extension is too long')
12 (once again). Ok. Then let’s download and install Node.js from official site.
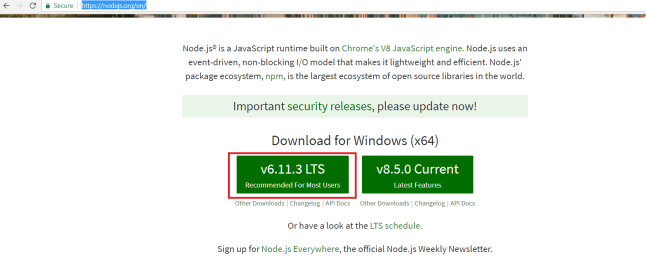
13. Open command prompt and test Node.js version
C:\Users\iscamc>node --version
v6.11.3
We are almost on the finish line. To build Kaitai Web IDE
14. Clone or download Kaitai Web IDE stable release from GitHub repository.
git clone --recursive https://github.com/kaitai-io/kaitai_struct_webide
You’ll see output like this
C:\Users>git clone --recursi
ve https://github.com/kaitai-io/kaitai_struct_webide
Cloning into 'kaitai_struct_webide'...
remote: Counting objects: 5175, done.
remote: Compressing objects: 100% (17/17), done.
remote: Total 5175 (delta 6), reused 12 (delta 5), pack-reused 5153
Receiving objects: 100% (5175/5175), 9.63 MiB | 4.49 MiB/s, done.
Resolving deltas: 100% (3852/3852), done.
Submodule 'formats' (https://github.com/kaitai-io/kaitai_struct_formats/) regist
ered for path 'formats'
Cloning into 'C:/Users/kaitai_struct_webide/formats'...
remote: Counting objects: 1576, done.
remote: Compressing objects: 100% (58/58), done.
remote: Total 1576 (delta 37), reused 63 (delta 23), pack-reused 1495
Receiving objects: 100% (1576/1576), 431.29 KiB | 2.82 MiB/s, done.
Resolving deltas: 100% (888/888), done.
Submodule path 'formats': checked out 'a3643b677daccfd323f7d9ace998292c9ee51811'
15. Open the folder where you placed Kaitai Web IDE (in my case
C:\Users\ide-kaitai-io.github.io
)
16. Run following command to install all the JavaScript and TypeScript dependencies with
npm install
17. Now compile and run the Web IDE itself
python serve.py --compile
Note: pay attention that instead of port 8000 you may need to use any other such as 8888 if 8000 is used by some application if you see the error below
socket.error: [Errno 10013] An attempt was made to access a socket in a way forb
idden by its access permissions
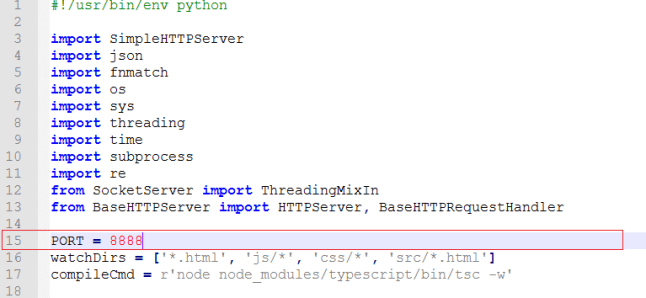
To fix this error open in any text editor of your choice serve.py file that resides inside Kaitai folder in my case in C:\Users\kaitai_struct_webide and replace PORT=8000 with, say PORT=8888 on line 15.
17 (in case of error). Rerun command below
python serve.py --compile
When everything worked nice you’ll see something like this
C:\Users\kaitai_struct_webide>python serve.py --compile
Starting typescript compiler...
Please use 127.0.0.1:8888 on Windows (using localhost makes 1sec delay)
Press Ctrl+C to exit.
12:57:28 AM - Compilation complete. Watching for file changes.
18. Go to http://127.0.0.1:8888/
Congratulations you’ve build Kaitai Web IDE!

![]()
![]()